Guides for home cultivation
– Growing in coffee grounds
– Growing in beech pellets
– Growing in straw
– Growing in wood
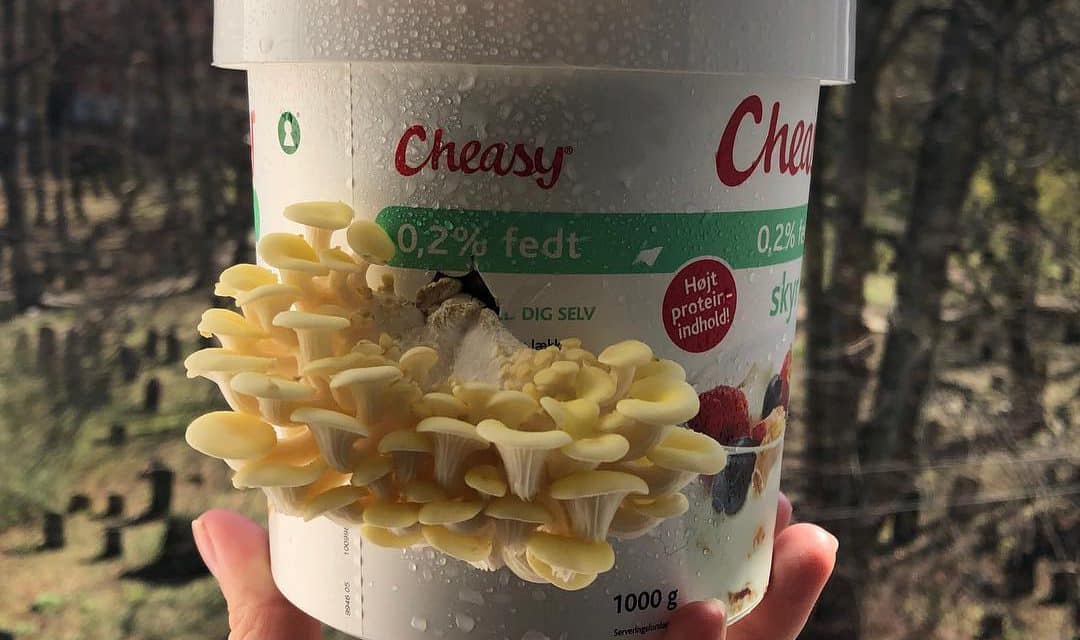
Growing in coffee grounds
This method can be used for all our mycelium types and is by far the easiest for those who are new to mushroom cultivation. The specific requirements and growing conditions for each mushroom, such as temperature, light and picking stage, can be found under “Description” on the relevant mycelium variant in the webshop.
Ingredients
– A clean plastic bucket with lid or a heavy-duty plastic bag (2-2.5 liters), possibly our substrate bags (link)
– Approx. 100 g mycelium (keep refrigerated)
– Fresh, cooled coffee grounds
– A spoon
Tip: Filter coffee grounds or grounds from a filter coffee or piston pot give the best results. Espresso grounds can be too dry.
Method 2 – continuous coffee grounds
- Follow steps 1-2 above.
- Mix a layer of fresh coffee grounds with mycelium (about 1 tablespoon of mycelium per half coffee filter grounds).
- Close the container and let the mycelium grow.
- When the mixture is white and fluffy, add a new layer on top (without stirring).
- Repeat until the container is full.
After 1-2 weeks, the fungi start to grow.
Growing tips
– As the mushrooms grow, it’s a good idea to spray them daily with an atomizer, otherwise they may dry out.
– You can “feed” the mixture according to the sourdough principle – cut off part of the culture and continue to feed it with coffee grounds in a new container.
– You can try temperature shocking your culture if no fungi appear. Throw it in the fridge for a day or two – this can get the mix going.
We love following our customers’ mushroom projects. Feel free to share your results in our Facebook group Community of Mushroom Growers, or tag us on Facebook and Instagram and don’t hesitate to contact us if you have any questions.
Growing in beech pellets
This method can be used for all our mycelium types, but is particularly suitable for shiitake, lion’s mane and oyster mushrooms. The individual mushrooms have different requirements for temperature and growing conditions, which you can find under “Description” on the relevant mycelium variant in the webshop (link).
Ingredients – beech pellets (for 1 container)
– 700 g beech pellets
– 150 g beech flour
– 150 g bran
– Approx. 2 liters of water
– 50-100 g Lion’s Mane mycelium
– Food grade plastic bag or container of 2-2.5 liters (max. 3 liters)
Procedure (beech pellets & crumb)
- Boil the water and pour about 1.8 liters of boiling water over the beech pellets, crumbs and bran. Stir and leave the mixture covered for about 1 hour.
- Stir again and check the humidity. The substrate should be moist, but no water should be able to squeeze out. Add the last bit of water if necessary.
- Once the substrate has cooled to below 30°C, mix in the mycelium thoroughly.
- Fill the substrate in a bag or container. Cut 2-4 holes of about 3-4 cm or two long cuts. Use boiling water to disinfect the container and tools.
- Cover the holes with breathable tape (e.g. sports tape or painter’s tape) and close the bag/container tightly.
- After about 2-3 weeks, the mycelium will typically have grown through the substrate. The first fungi usually start growing after another 1-2 weeks. As you are working with living organisms, the time may vary.
Growing tips
– As the mushrooms grow, it’s a good idea to spray them daily with an atomizer, otherwise they may dry out.
– You can try temperature shocking your culture if no fungi appear. Throw it in the fridge for a day or two – this can get the mix going.
We love following our customers’ mushroom projects. Feel free to share your results in our Facebook group Community of Mushroom Growers, or tag us on Facebook and Instagram and don’t hesitate to contact us if you have any questions.
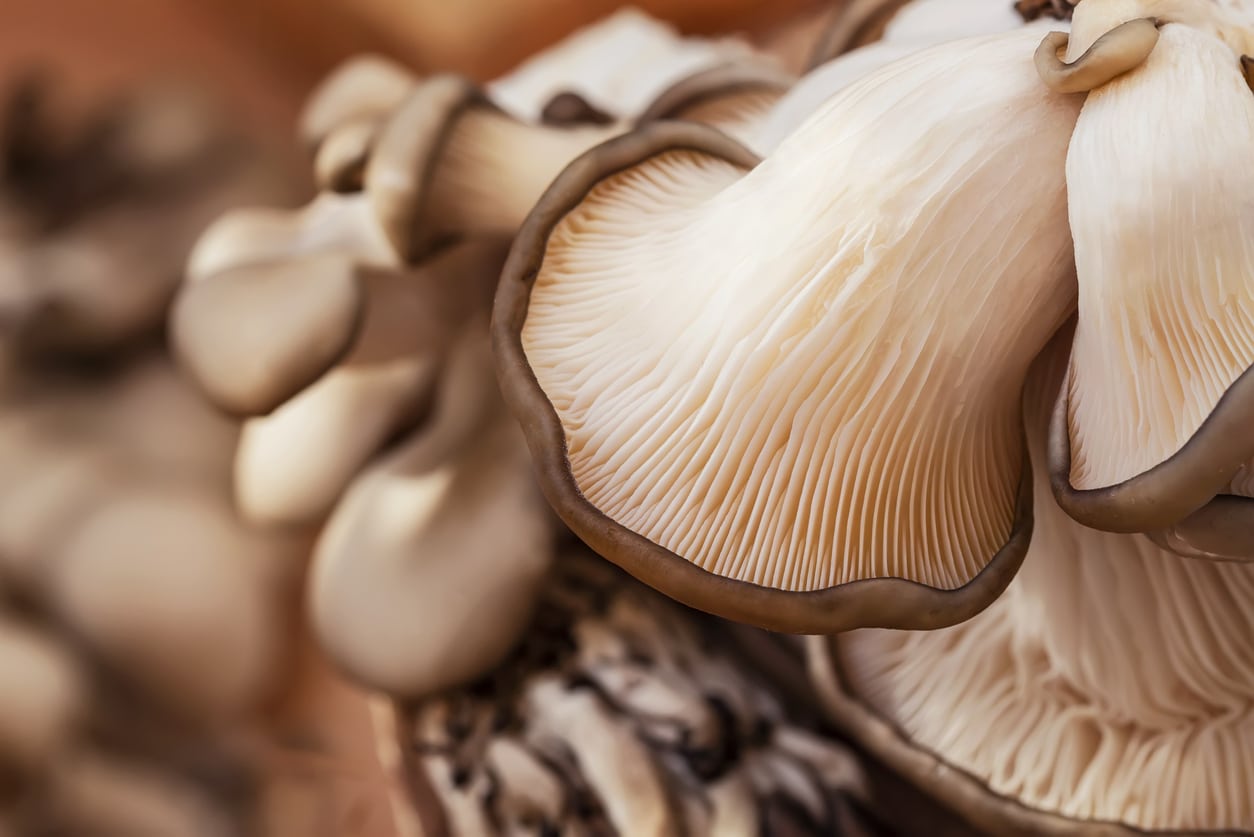
Growing in straw
Growing in straw can give very good results, but requires a little more preparation and often more space than coffee grounds. This method is particularly suitable for oyster mushrooms and is often used when you want higher yields.
In this guide, we share our own experiences of growing in straw and have gathered the best tips and tricks from other mushroom growers to give you the best conditions for successful cultivation.
Find mycelium for brown/grey oyster mushrooms here and yellow oyster mushrooms here .
The specific temperature, light and picking stage requirements for each oyster mushroom variety can be found under “Description” on the relevant mycelium variety.
How to grow oyster mushrooms in straw
Oyster mushrooms can be grown in both cut straw and whole straw bales. The choice depends on how much space you have and how big a setup you want.
Ingredients
– Healthy barley, wheat or seed grass straw
– Heavy duty plastic bag or container for fermentation
– Mycelium
There are several ways to prepare straw, depending on quantity and space. Below we describe both whole bale and chopped straw preparation.
Procedure – whole straw bales
To avoid unwanted fungi and insects, the straw must first be fermented. At the same time, the straw is “opened” to make it more receptive to the mycelium.
- Completely submerge the straw bale in water for 14 days at a minimum of 10°C.
This can be done in a large container or a strong plastic bag.
Note: The water will start to smell strong – this is completely normal and should not be replaced.
- After 14 days, place the bale on its long, narrow side for about 24 hours to allow excess water to drain.
- Then place the bale on the largest surface and make 10-15 holes evenly distributed around the bale, 15-25 cm deep (e.g. with a planting stick).
- Fill the holes with mycelium and close them tightly with damp straw.
- Place the straw bale in a greenhouse, garage, basement, barn or outdoors in a damp and shady place.
The optimal temperature for overgrowth is 20-25°C (not to exceed 30°C).
- You may want to cover the bale with foil or place it in a plastic bag. Remember to make 10-15 small holes (about 0.5 cm) to ensure airflow.
Process – chopped and pre-treated straw
Pre-treated/fermented straw (see above) is packed as tightly as possible in plastic bags. It is recommended to cut the straw into 2-4 cm pieces.
Cut straw is typically fermented for about 7 days.
During packing, mycelium is added at approximately 25g per kg of moist straw, evenly distributed.
Close the bag and make 10-15 horizontal cuts of approximately 2 cm, evenly distributed over the surface of the bag.
If you use clear plastic bags, you can follow the overgrowth visually. When the contents appear predominantly white, the mycelium is fully grown and the fungi will start growing out through the incisions.
Hardwood cultivation (logs and stumps)
Growing in hardwood is ideal if you’ve recently felled wood or have access to fresh tree stumps. The method is suitable for both beginners and more experienced mushroom growers and requires minimal daily care once the culture is established.
Suitable tree species include beech, hornbeam, birch, birch, maple, poplar, willow, rowan and fruit trees.
Oyster mushrooms and shiitake (link) are particularly suitable for growing in hardwoods.
Find mycelium for brown/gray oyster mushrooms here (link) and yellow oyster mushrooms here (link).
How to grow in hardwood
Crops planted outdoors in the fall should be inoculated at least one month before frost to allow the mycelium to establish itself. Autumn crops have the advantage of high humidity and can often be harvested early the following year.
If logs or stumps can be stored frost-free, they can be grafted and grown all year round.
Before sawing or drilling, it is a good idea to wash the graft site with a mild chlorine solution. Allow the surface to dry completely before continuing.
We love following our customers’ mushroom projects. Feel free to share your results in our Facebook group Community of Mushroom Growers or tag us on Facebook and Instagram and don’t hesitate to contact us if you have any questions.
Method – logs
Ingredients
– Freshly felled hardwood logs (minimum 10 cm in diameter, length 40-60 cm)
– Mycelium (amount depends on number of strains)
– Nails and tape or other covering
Here’s how you do it
- Saw a slice about 5 cm thick from one end of the trunk.
- Spread a layer of mycelium about 0.5 cm thick evenly over the entire cut surface.
- Replace the sawn-off disk and secure it with a nail to ensure good contact between mycelium and wood.
- Cover the cut surface with tape or similar to retain moisture.
- Cover the logs with plastic or put them in plastic bags and place them in a shed, garage, barn or a damp, shady spot in the garden.
Optimal temperature: 20-25 °C. Lower temperatures also work, but prolong the process.
- Depending on the wood species, temperature and humidity, the mycelium will grow through the wood in 4-12 months.
- When the stem is fully grown, remove the cover and bury the stem 10-15 cm into the ground with the ungrown end downwards, in a shady place.
Method – tree stumps
Ingredients
– Fresh hardwood stumps (max 3-4 years old)
– Mycelium
– Cork plugs or plastic cover
Oyster mushrooms and shiitake thrive in fresh tree stumps, which also decompose quickly and naturally.
Here’s how you do it
– The stump is grafted either by the intersection method (as described above) or by drilling holes.
– The drilling method involves drilling a series of holes (e.g. cork plug size) about 10 cm vertically into the stump – the more the better.
– Fill the holes with mycelium and close them with cork stoppers or cover the stump with plastic.
Like straw cultivation, harvesting comes in waves, but with outdoor tree cultivation there is a longer time between harvest periods. Typically, you can expect 2-3 harvests per year.
Pests
Slugs in particular love mushrooms and can destroy an entire harvest in one night.
Snails can be kept away by e.g:
– lime spreading
– sawdust
– wood ash
When growing in bags, the bags can be hung up.

If you’ve recently purchased one of our mushroom bags or are thinking about doing so, read on for more information on how to get started. The mushroom bag requires no prior knowledge of mushrooms and minimal care.
Leave the mushroom bag in the box and place the box in a cool place until you want to start cultivation. When you want to activate the mushroom bag, follow the guide below.
GET OFF TO A GOOD START
Take the sponge bag out of the box. The substrate is in a plastic bag inside a burlap bag.
Tie the jute bag with the included string or remove the jute bag for a more rustic look.
Cut 4-6 holes distributed on the bag, the holes should be cut through both the jute bag and the plastic bag.
- The holes/incisions are cut with a sharp knife.
- The cuts should be horizontal and approximately 2 cm long.
- You can place the cuts as you like; either around the entire bag or just on one side of the bag.
- Space the holes apart so that the mushrooms have room to grow.
Place your mushroom bag where you want it to be.
- It can be both outdoors and indoors, as long as it gets some daylight.
- The bag should not be left in direct sunlight and should be protected from wind as much as possible.
- The bag can also be hung up, which will effectively protect it from possible snail infestation
The bag then takes care of itself.
As the mushrooms grow out, you can spray water on the mushrooms continuously if they seem dry.
Some of the mushrooms may wither completely on their way out. This is completely normal.
In some cases, fungi will come out of all the holes, but more often than not, fungi will only come out of some of the holes.
The mushrooms are ripe and ready to be picked when they become bright and “sharp” at the edges.
This will be after approximately 1 week of growth.
Simply wipe off the sponges gently with your hands.
If the mushrooms start to turn yellowish, they should be picked immediately as this is a sign of over-ripeness. No damage has been done. They still taste delicious.
- The substrate is made from straw from organic fields.
- The jute bag is sustainably produced and food approved.
- The plastic bag is made of food grade plastic.
- Cardboard boxes are made from recycled cardboard.
- The guide is printed on recycled paper.
THE LIFE OF THE SPONGE BAG
The mushrooms grow in “breaks”. Once the first-break is over, the bag will pause before a second-break will grow. You can choose to let the second-break come out of the original first-break holes, or you can cut new holes elsewhere on the bag. Experiment as you go. For the third break etc. repeat the procedure and continue with the same/new holes.
The mushrooms grow best at 18°C and it is the temperature and humidity that determines how many mushrooms and how much vomit the bag can produce, as well as the time between vomits. The bag will go dormant when temperatures get too high or low, but it will not be destroyed and both the bag and any outgrown mushrooms can also withstand frost and will continue to grow when temperatures rise again. The older the bag gets, the longer the time between breaks and the fewer mushrooms there will be per break. Due to the weather conditions and indoor temperatures, it is difficult to say anything general about the harvest. However, if you try, it can be said that a bag placed under favorable conditions will in most cases be able to continue its production for about 1 year, during which time it will produce 3-5 puffs. …. You must be patient between puffs.
When you no longer want to use the bag, the organic straw in the bag, due to its processing, is very suitable as an environmentally friendly fertilizer in the soil around plants and beds in your garden or backyard.
OYSTER MUSHROOMS AT SKYTTEGÅRDEN
The bag is produced by the organic Danish nursery Skyttegårdens Østershatte ApS. The nursery, which has specialized in growing oyster mushrooms since 1983, is located in Borup in central Zealand and has always been run by the Matthiesen family. Skyttegårdens Østershatte was one of the first nurseries in Denmark to introduce oyster mushrooms to the Danish market and has over time become Denmark’s largest producer of oyster mushrooms. Due to the sparse production of oyster mushrooms in Denmark, many of the production machines and procedures in the nursery were invented and developed by Skyttegården itself. Organic straw is used for the mushroom bags and production takes place without the use of artificial fertilizers and pesticides.
CONTACT US
See much more at www.østershatte.dk. Follow us on Facebook and Instagram and feel free to tag us in your photos @skyttegårdensøstershatte and #skyttegårdensøstershatte.
We wish you the best of luck with your organic oyster mushroom harvest!